As I promised earlier, we are going to take a look at how to develop a game in MonoGame targeting multiple platforms at the same time, using Visual Studio 2019. It may seems like a nuisance first, but once you’ve experienced the pain of deploying a game to mobile that you have originally developed to PC (or some other platform), you’ll see why it’s so great to be able to run it on both platforms and catch the performance and other issues early on, rather than seeing all the problems at once, not even knowing where to start fixing/changing the code.
Pre-requisite for this tutorial: have MonoGame and Visual Studio 2019 installed according MonoGame’s Getting Started documentation. And, of course, a bit of MonoGame knowledge is also helpful. If you lack the basics, go through RB Whitaker’s very good tutorials, and you’ll be up to speed in no time.
This is approach is also very useful even if you are only targeting mobile, because running and testing your game on your computer with mouse+keyboard is much faster than always deploying the whole package to your phone, especially when you make frequent, small code changes or finetuning some features that requires lots of consecutive deployments. So let’s get to it!
There is no superior, streamlined way to develop a game, so we are going to take a look at my approach, which means the following:
- I have a video game engine that I’m using to make my game(s), this is a shared code in a separate project
- I have a game project, that uses the aforementioned engine code from project 1. and contains the game logic itself, a “platformless” shared project. This code can’t be ran in itself, but it can be included in the target platforms’ solutions.
- I have 2 separate projects targeting mobile and PC, both includes the code from project 2., but they each run the game on the respective platform.
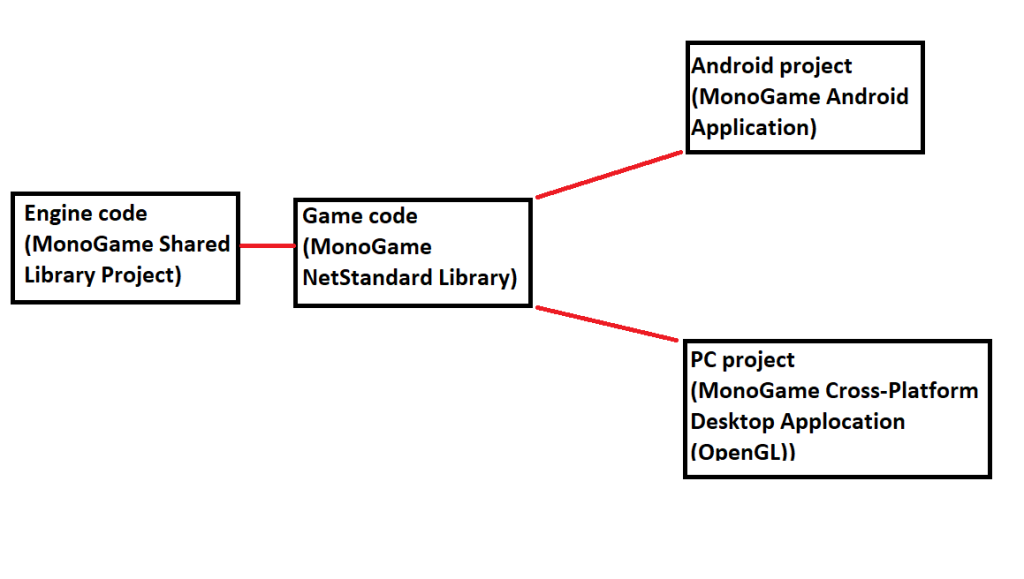 The project landscape I’m using
At this point, you might want to ask: why bother with an engine and a game code separately, why can’t I just have one source code project for the game and that’s it? This a fair question, and not every game requires an external engine, you can just code your game directly. In my case, I maintain this engine that encapsulates the most common functionalities that video games need (Camera, collisions, UI, etc.), but if you have a codebase specifically for the video game itself, without having engine or library, you can still follow along this tutorial by just skipping project 1 or 2. For the sake of this tutorial, we are going to use my method, the one I sketched up in the picture above.
Creating the project for the engine
First, we’ll create our shared project for the engine. This code can be included in many of your games, it has the advantage of implementing something once and then reusing it in as many games as you want.
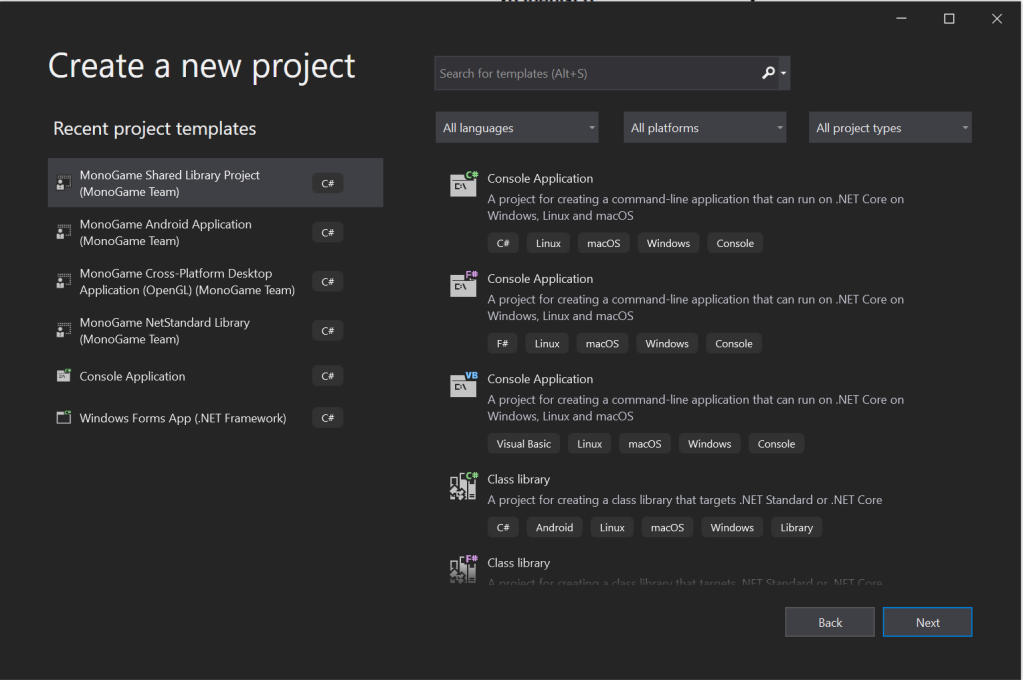
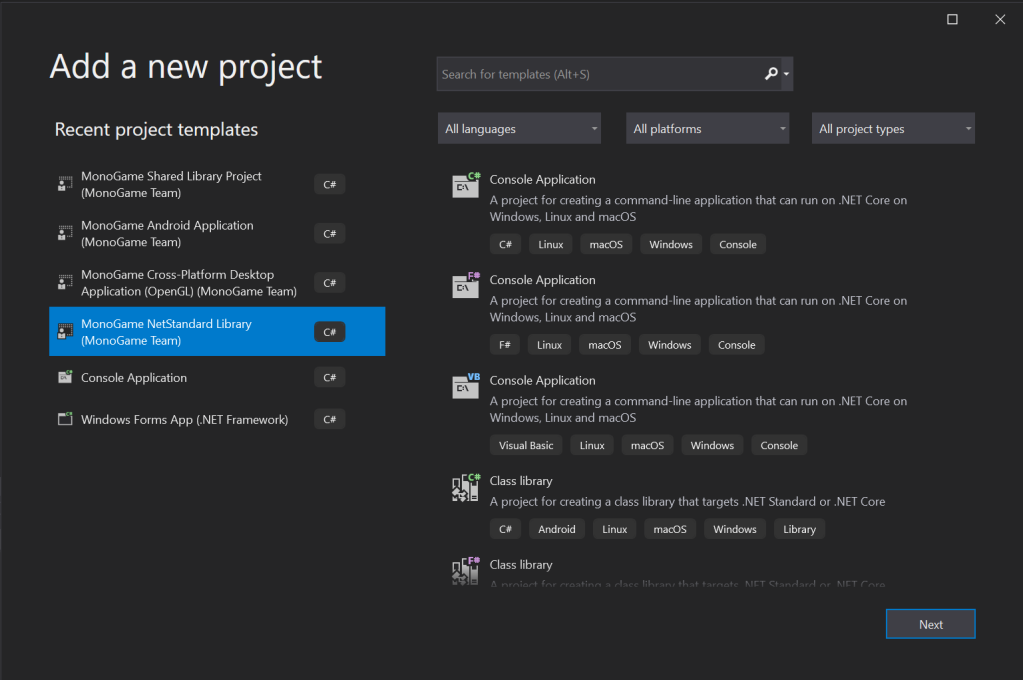
Create a new project, and select MonoGame Shared Library Project. I will name it MyAmazingGameEngine.
Now you should see the default MonoGame project
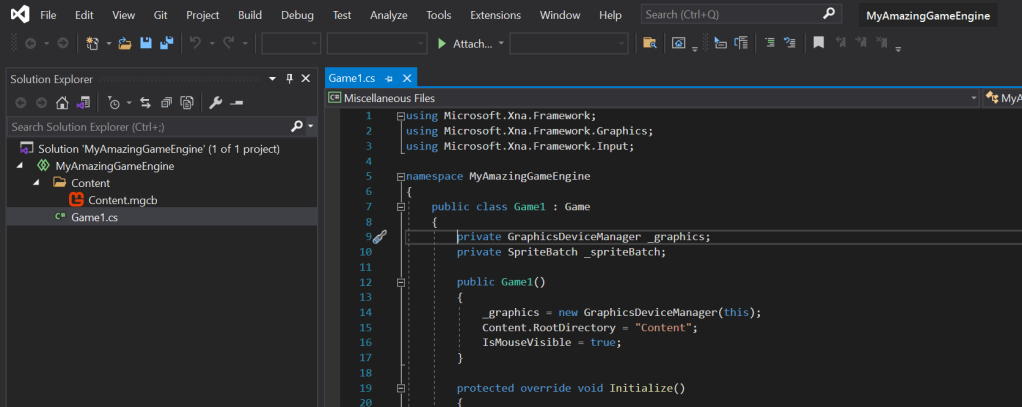
Notice that there is no way to run this project as it is. This is a shared project, which means that this code is supposed to be included in some other project, which will do soon. For now, delete Game1.cs because we won’t need it. Also, create a new directory called Source (or whatever you wish, this indicates that the engine’s source is inside) and create a RectangleShape.cs inside. Make sure to add ‘public’ visibility modifier to the class declaration!
using System;
using System.Collections.Generic;
using System.Text;

namespace MyAmazingGameEngine
{
    public class RectangleShape
    {
    }
}
Since at this point, you have no option compile or run your code, let’s put aside this code and create a second project, which will allow you to compile and run your engine! We will get back to coding our character, but it will be much easier once the IDE also compiles and marks errors, does autocomplete, etc.
Creating the project for the game
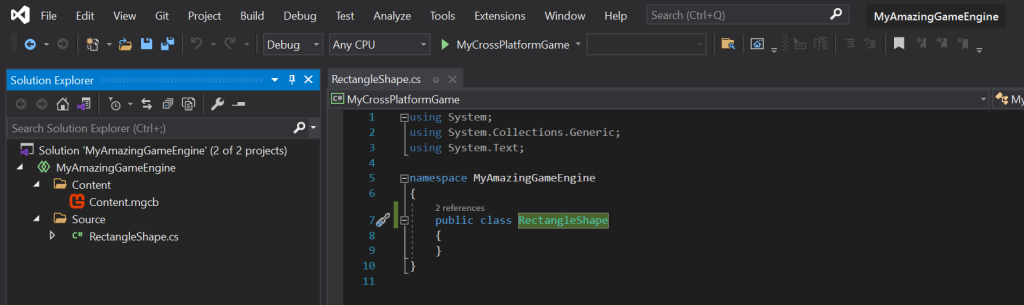
In your Solution Explorer, right click your solution and then select Add -> New Project… and select “MonoGame NetStandard Library”. I’m going to name it “MyCrossPlatformGame”.
Now you should see something like this:
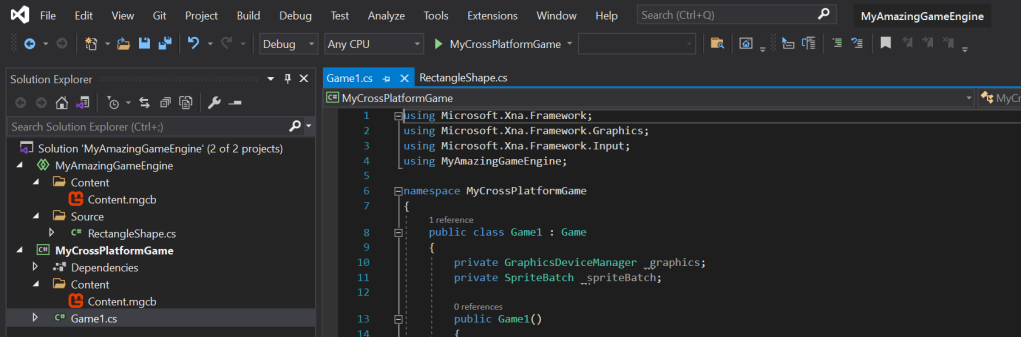
Now you have to add your engine’s shared to the game’s code to be able to use it. To do that, in your Solution Explorer, right click on the MyCrossPlatformGame project and select
Add -> Shared Project Reference.
In the appearing window, tick MyAmazingGameEngine and click OK.

Now you can build your project! You still can’t run in as there is no target platform yet, but we will get there soon. For now, enjoy code completion and error detection 🙂
Go back to your engine project, open and RectangleShape.cs. The following code taken from one of my early posts will create a rectangle texture:
using Microsoft.Xna.Framework;
using Microsoft.Xna.Framework.Graphics;

namespace MyAmazingGameEngine
{
    public class RectangleShape
    {
        private Texture2D texture;

        public RectangleShape(GraphicsDevice graphicsDevice, int size, Color color)
        {
            texture = new Texture2D(graphicsDevice, size, size);
            Color[] data = new Color[size * size];
            for (int i = 0; i < data.Length; ++i)
            {
                data[i] = color;
            }
            texture.SetData(data);
        }

        public Texture2D GetTexture()
        {
            return texture;
        }
    }
}
Now, let’s create a character! Well, it will be a simple square, but you get the idea 🙂 Go to the video game code project (MyCrossPlatformGame), and just like before, create a Source directory and create a Character.cs file inside and we will use the previously implemented RectangleShape class to display a sprite for our hero. We will also have an Update and a Draw method for our hero display and move it.
using Microsoft.Xna.Framework;
using Microsoft.Xna.Framework.Graphics;
using MyAmazingGameEngine;

namespace MyCrossPlatformGame
{
    public class Character
    {
        private RectangleShape sprite;
        private Vector2 position = new Vector2(30, 100);
        private float speed = 0.3f;

        public Character(GraphicsDevice graphicsDevice)
        {
            sprite = new RectangleShape(graphicsDevice, 50, Color.Red);
        }


        public void Update(GameTime gameTime)
        {
            if (position.X < 30 || position.X > 600)
            {
                speed *= -1;
            }

            position.X += speed * (float)gameTime.ElapsedGameTime.TotalMilliseconds;
        }

        public void Draw(SpriteBatch spriteBatch)
        {
            spriteBatch.Begin();
            spriteBatch.Draw(sprite.GetTexture(), position, Color.White);
            spriteBatch.End();
        }

    }
}
Notice that we are combining the code from the engine and the game projects!
Next, open Game1.cs in the MyCrossPlatformGame project, and rename it to something more meaningful, like MyGameMain.cs. Let’s use the newly added Character class to instantiate a hero! Add a private Character member into the MyGameMain class, instantiate it in the LoadContent() function and call the Update/Draw methods accordingly:
using Microsoft.Xna.Framework;
using Microsoft.Xna.Framework.Graphics;
using Microsoft.Xna.Framework.Input;
using MyCrossPlatformGame;
namespace MyCrossPlatformGame
{
public class MyGameMain : Game
{
private GraphicsDeviceManager _graphics;
private SpriteBatch _spriteBatch;
private Character hero;
public MyGameMain()
{
_graphics = new GraphicsDeviceManager(this);
Content.RootDirectory = "Content";
IsMouseVisible = true;
}
protected override void Initialize()
{
// TODO: Add your initialization logic here
base.Initialize();
}
protected override void LoadContent()
{
_spriteBatch = new SpriteBatch(GraphicsDevice);
hero = new Character(_graphics.GraphicsDevice);
// TODO: use this.Content to load your game content here
}
protected override void Update(GameTime gameTime)
{
if (GamePad.GetState(PlayerIndex.One).Buttons.Back == ButtonState.Pressed || Keyboard.GetState().IsKeyDown(Keys.Escape))
Exit();
hero.Update(gameTime);
// TODO: Add your update logic here
base.Update(gameTime);
}
protected override void Draw(GameTime gameTime)
{
GraphicsDevice.Clear(Color.CornflowerBlue);
// TODO: Add your drawing code here
hero.Draw(_spriteBatch);
base.Draw(gameTime);
}
}
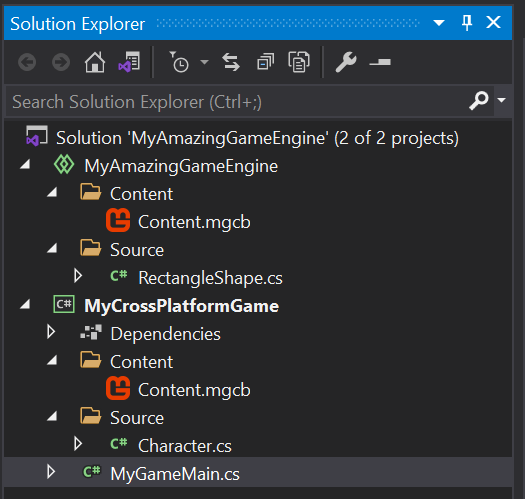
}Now, let’s run our code on our developer machine! Let’s take a final look at how your project should look like at this point:
Creating the desktop project
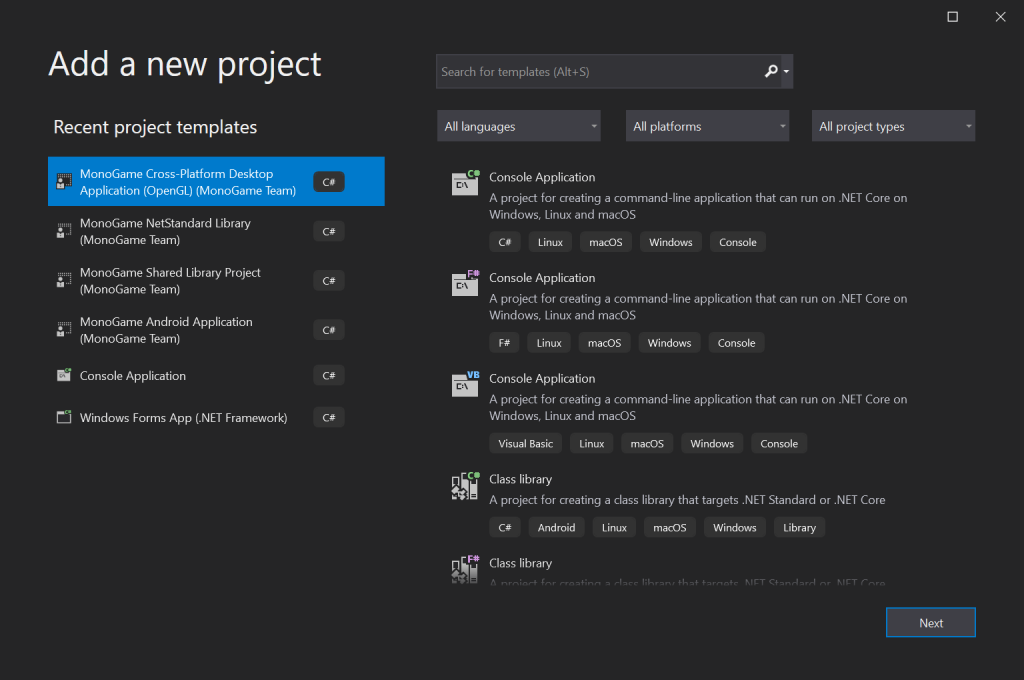
Just like we did before, add a new project to the solution. In your Solution Explorer, right click your solution and then select Add -> New Project… and select “MonoGame Cross-Platform Desktop Application”. I’m going to name it “MyGameDesktop”.
Right click on the MyDesktopGame project, Add -> Project Reference… and in the appearing window, tick MyCrossPlatformGame.
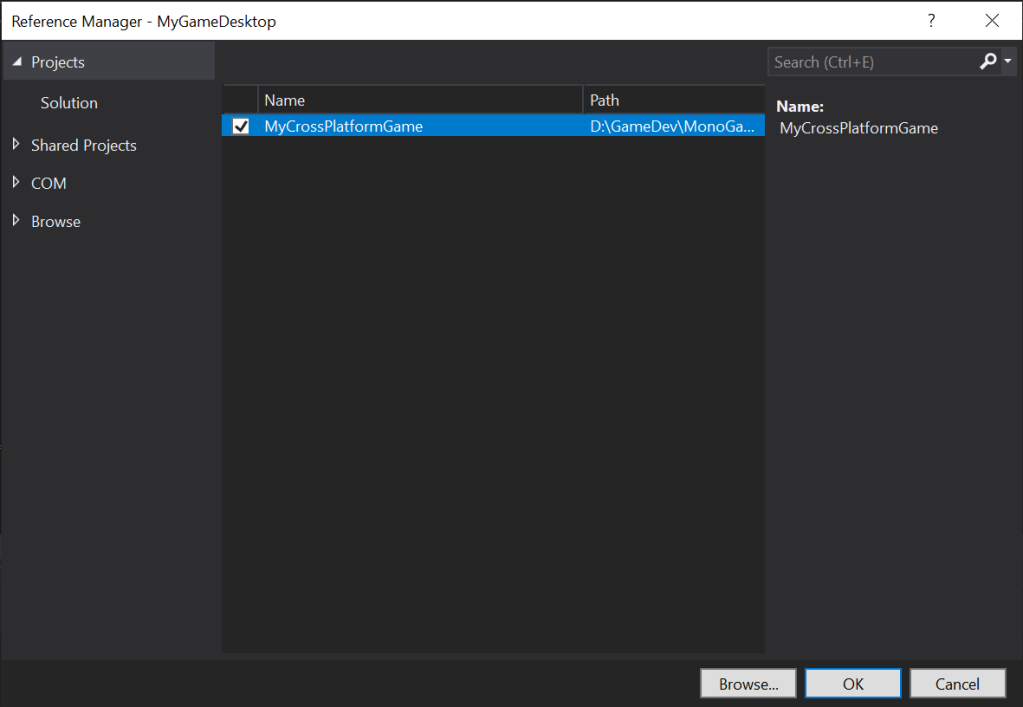
Delete the auto-generated Game1.cs class in the MyDesktopGame project, we won’t need it. Next, go Program.cs and change the Main function to this:
using MyCrossPlatformGame;
using System;
namespace MyGameDesktop
{
public static class Program
{
[STAThread]
static void Main()
{
using (var game = new MyGameMain())
game.Run();
}
}
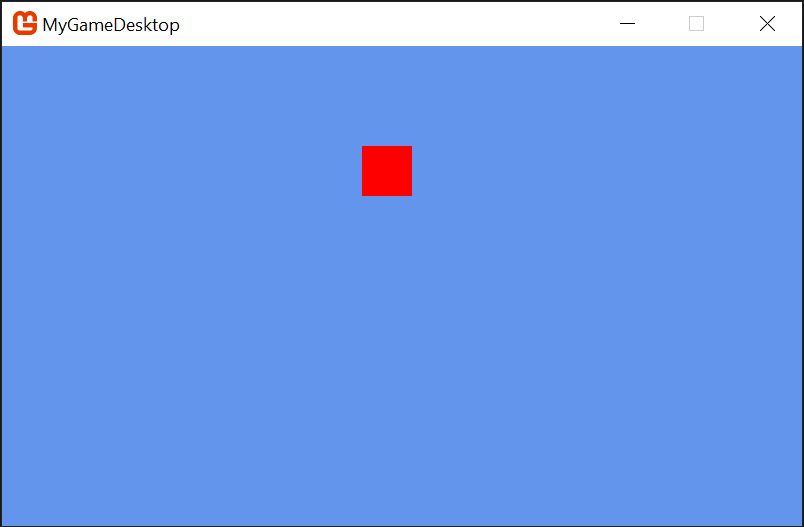
}Let’s test it! You can now right clock on MyGameDesktop, select Debug -> Start New Instance to see your game running on your PC! If you did everything correctly, you should see a red square moving on your screen:
Now, I promised you a cross-platform code, so cross-platform code you get! Let’s create the Android project.
Creating the Android project
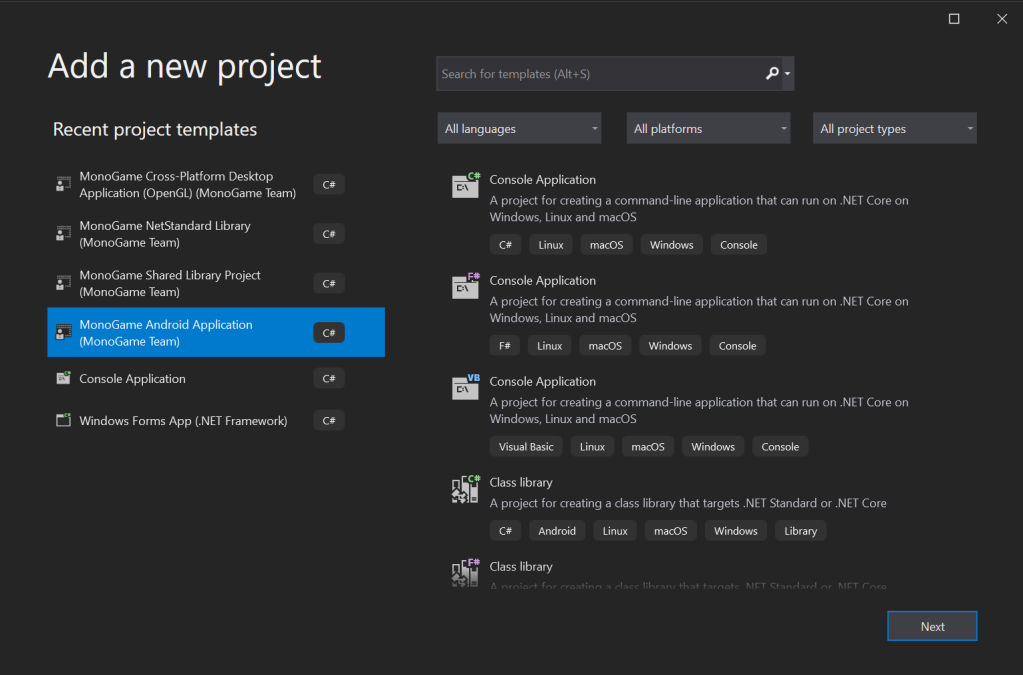
By this point, you should a pro in adding new project into your solution. In your Solution Explorer, right click your solution and then select Add -> New Project… and select “MonoGame Android Application”. I’m going to name it “MyGameAndroid”.
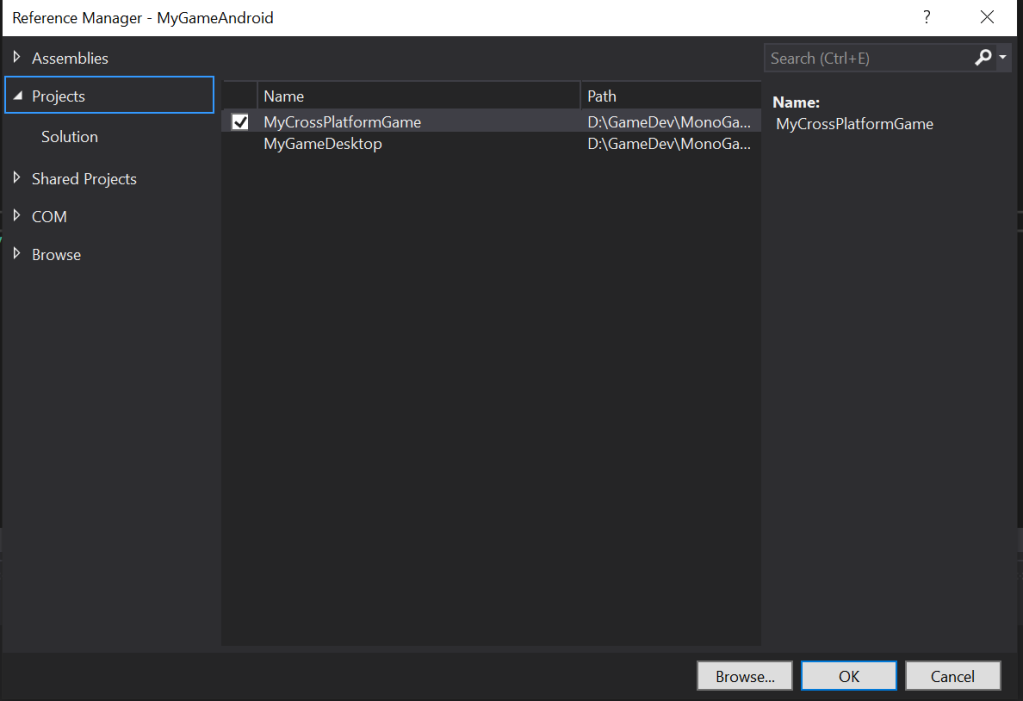
Right click on the MyDesktopAndroid project, Add -> Reference… and in the appearing window, tick MyCrossPlatformGame.
Again, delete the generated Game1.cs from the MyGameAndroid solution, and change Activity1.cs like so:
using Android.App;
using Android.Content.PM;
using Android.OS;
using Android.Views;
using Microsoft.Xna.Framework;
using MyCrossPlatformGame;

namespace MyGameAndroid
{
    [Activity(
        Label = "@string/app_name",
        MainLauncher = true,
        Icon = "@drawable/icon",
        AlwaysRetainTaskState = true,
        LaunchMode = LaunchMode.SingleInstance,
        ScreenOrientation = ScreenOrientation.FullUser,
        ConfigurationChanges = ConfigChanges.Orientation | ConfigChanges.Keyboard | ConfigChanges.KeyboardHidden | ConfigChanges.ScreenSize
    )]
    public class Activity1 : AndroidGameActivity
    {
        private MyGameMain _game;
        private View _view;

        protected override void OnCreate(Bundle bundle)
        {
            base.OnCreate(bundle);

            _game = new MyGameMain();
            _view = _game.Services.GetService(typeof(View)) as View;

            SetContentView(_view);
            _game.Run();
        }
    }
}
Now you have the option to run the game on your phone (if you don’t see this, restart Visual Studio):

Let’s test it!
And you’re done! Now you can go ahead and develop your game easily to mobile and/or other platforms! You can add platform-specific code in the engine, and/or in the game code project, the codebases are nicely separated and whenever you make a change, you can quickly test it in each platform. Just keep in mind that in the engine and in the game’s code, the macro ANDROID or ANDROID will not work, because the conditional compilation symbols are not passed from one project to another, their scope is only in the project where you have defined them. However, you can have a public static bool variable in any class, which you set to true only from the Android project, and leave it on false when you are running the desktop code. This way, you can easily define different behaviors on different platforms, like using touch input for mobile and using mouse+keyboard on desktop.
If you’d like to see how I work in practice, check the GameSamples\PlatformerGame directory on my Github repository to see the example platformer game for PC and mobile.
I hope you like this tutorial, happy coding!
In case you had troubles following along, you can download the example from here.

Email : lajbertgames@gmail.com
Website : https://lajbert.github.io